
Simplified Guide: How to Put on Baby Diaper Successfully

Key Highlights
- Having a designated, safe changing area with all your supplies within reach is crucial before starting a diaper change.
- Selecting the right diaper size and type is essential for your baby’s comfort and to prevent leaks.
- Always prioritize hygiene during diaper changes, ensuring to clean your baby’s diaper area thoroughly.
- Secure the diaper snugly, allowing for comfortable movement while avoiding tightness that could restrict circulation or irritate the skin.
- Mastering how to properly put on a diaper takes practice; don’t worry about initial challenges.
Introduction
Learning how to put on a diaper correctly is a fundamental aspect of caring for a new baby. While the task may appear straightforward, new parents often find that it requires a bit of practice. This simplified guide offers a step-by-step approach to diapering an infant, empowering you to confidently keep your little one clean, dry, and comfortable. We’ll also cover essential tips and tricks for success, including how to change a boy’s diaper without him peeing.
Essential Diaper Changing Supplies
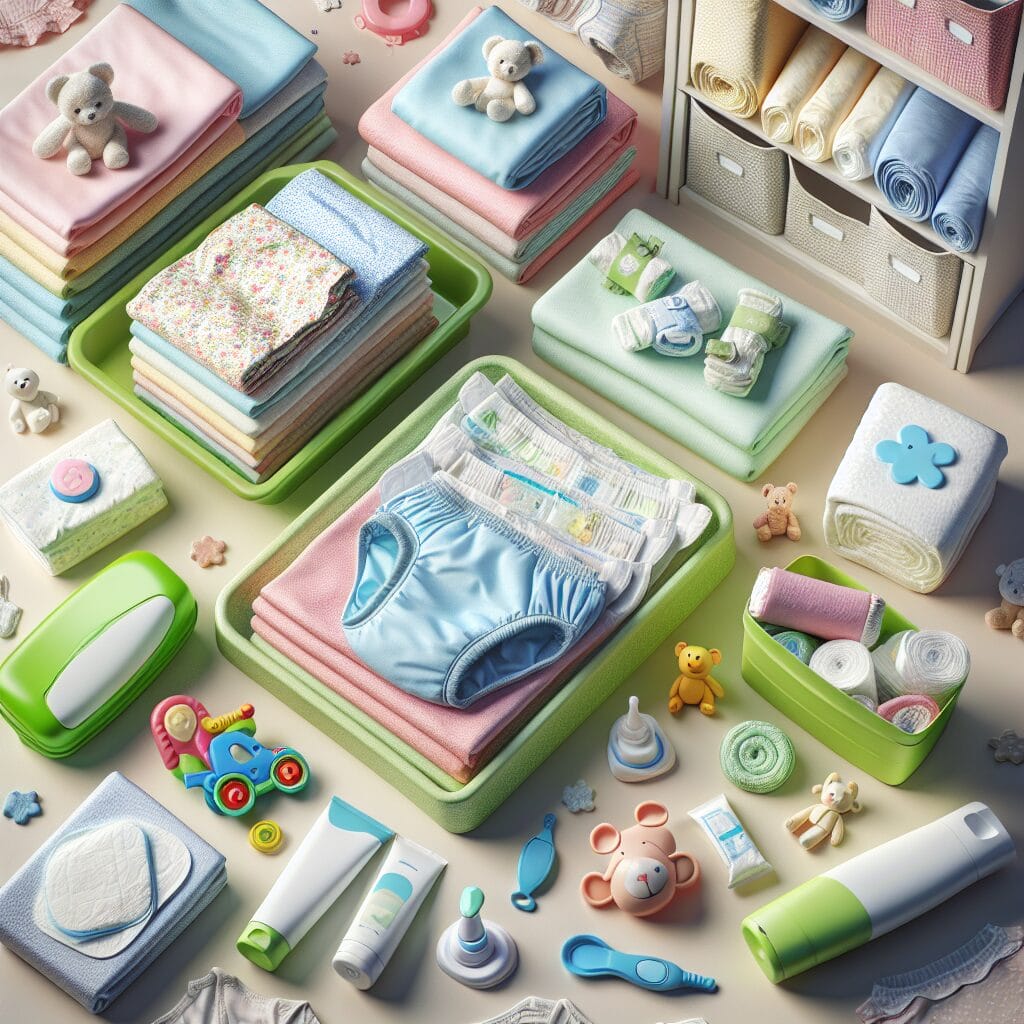
Before starting to diaper a baby, it’s crucial to assemble the necessary supplies within arm’s reach. Having everything readily available will make the process significantly smoother. You’ll need a designated area, ideally a changing table, that provides a safe and comfortable space for your baby.
Gather the following essential diapering items: diapers in your baby’s size, wipes (alcohol-free and fragrance-free), diaper cream, a soft cloth or two, a changing pad or towel for the changing surface, a diaper pail for disposal, and, just in case, a change of clothes for your baby.
Choosing the Right Diaper for Your Baby
Selecting the appropriate diaper for your baby involves considering various factors, including your baby’s age, weight, and sensitivities. Disposable diapers like Pampers are convenient and widely available, while cloth diapers are an eco-friendly alternative. If your baby has sensitive skin, opt for hypoallergenic and fragrance-free diapers explicitly designed for delicate skin.
When choosing between cloth and disposable diapers, factors such as your lifestyle, budget, and environmental concerns come into play. Cloth diapers require washing and drying, which might not suit everyone. Disposable diapers offer unparalleled ease of use but come with a higher environmental impact. Ultimately, the best diaper for your baby is one that effectively keeps them clean, dry, and comfortable without causing any skin irritation.
If you observe signs of redness or irritation, switching to a different diaper brand or type might be necessary. Consulting your pediatrician or a healthcare professional for recommendations on how to use Pampers diapers or any other type suitable for your baby’s specific needs is always advisable.
Wipes, Creams, and Other Necessities

In addition to diapers, certain essential items are indispensable for how to diaper a newborn. Wipes are paramount for gently cleaning your baby’s diaper area. Opt for alcohol-free and fragrance-free wipes, which are designed to be gentle on sensitive skin.
Pee-Ka-Poo wipes contain honeysuckle to help prevent diaper rash by acting as a lubricant, and aloe vera to reduce inflammation and soothe eczema. Made from bamboo cloth, they are less likely to cause rashes and are also tear-resistant, pH balanced, and alcohol-free, minimizing irritation. Diaper cream serves as a protective barrier against moisture, preventing diaper rash.
Look for diaper creams containing zinc oxide or petroleum jelly, known for their soothing and protective properties. Apply a thin layer of diaper cream to your baby’s clean, dry bottom during each change. A barrier cream can also be incredibly beneficial, especially if your baby is prone to diaper rash.
Remember, a clean and dry diaper area is crucial in preventing diaper rash, so always ensure thorough cleaning and drying before putting on a fresh diaper.
Preparing Your Diaper Changing Station
Prior to initiating a diaper change, it’s essential to prepare a safe and convenient changing station. This designated area should have all the necessary supplies within easy reach, allowing you to keep one hand on your baby for safety. A well-organized diaper changing station will make the process more efficient and less stressful for both you and your baby.
Choose a stable, elevated surface such as a changing table or a dresser designated for diaper changes. Cover the surface with a changing pad or towel for comfort and hygiene. Remember, never leave your baby unattended on an elevated surface, even for a moment. Always keep a watchful eye and one hand on your baby throughout the changing process.
Location Tips for Convenience and Safety
Choosing the appropriate location for how to properly put on a diaper is crucial. You want a spot that is both convenient and safe for your baby. Ideally, select a room that consistently maintains a comfortable temperature. Avoid areas with drafts or direct sunlight.
Consider proximity to running water for easy cleanup. If a bathroom is not an option, ensure access to warm water and a basin for handwashing. A changing table with safety rails and a secure strap is highly recommended to prevent falls.
If you’re using a changing pad on the floor, select an area free of clutter and potential hazards. Regardless of location, always remember to keep one hand on your baby throughout the changing process.
Must-Have Items at Your Changing Station
To make diapering a baby as efficient as possible, equip your changing station with these must-have items:
- Fresh Diapers: Always have a stack of clean diapers in the appropriate size for your baby.
- Wipes: Choose alcohol-free and fragrance-free options for sensitive skin.
- Diaper Cream or Ointment: Opt for creams containing zinc oxide or petroleum jelly to prevent and treat diaper rash.
- Diaper Pail: Invest in a dedicated diaper pail with a lid to contain odors effectively.
- Soft Cloth or Two: Keep a clean, soft cloth or two on hand for drying your baby’s bottom.
These essentials ensure a smooth and hygienic diaper change while keeping your baby comfortable.
Understanding Your Baby’s Needs
Diaper changes are not solely about hygiene but also provide an opportunity to bond with your baby. Take advantage of this time to interact, soothe, and nurture them. It’s about creating a positive experience during what could otherwise be an uncomfortable situation for your baby.
Always be attentive to your baby’s cues and respond promptly when they need a change. A calm and nurturing approach will make the diaper-changing routine a more enjoyable experience for both you and your baby.
Recognizing When It’s Time for a Change

Recognizing when your baby needs a diaper change is crucial for their comfort and hygiene. While newborns typically require frequent diaper changes—often after every feeding—older babies may have longer intervals between changes. A wet diaper is usually apparent, feeling heavier and potentially displaying a color change indicator on disposable diapers.
Soiled diapers often have a distinct odor, and you may even notice a bulge or feel a different texture through the diaper. Pay attention to your baby’s behavior, as they may become fussy or uncomfortable when their diaper is wet or soiled.
Establishing a consistent diaper-changing routine based on your baby’s age, feeding schedule, and individual needs is important. Frequent checks and prompt changes will keep your baby content and minimize the risk of skin irritation or diaper rash.
Interpreting Different Types of Cries and What They Mean
Babies communicate through cries, and as new parents, it’s essential to learn to differentiate between them. A cry accompanied by pulling at the diaper or restlessness could indicate a wet or soiled diaper. Promptly check their diaper and change if needed.
If you notice a persistent red and irritated rash on your baby’s bottom, they may have diaper rash. Keep the area clean and dry, apply diaper cream, and consider using super absorbent diapers or increasing the frequency of changes. If the rash doesn’t improve, seek advice from your healthcare provider.
Sometimes, a baby’s cry might signal other issues beyond a diaper change, such as hunger, fatigue, or discomfort. Paying close attention to your baby’s behavior, along with their cries, can help you understand their needs better.
Step-by-Step Guide to Putting on a Diaper
Now that you’ve prepped your changing station, gathered the supplies, and learned how to read your baby’s cues, let’s go through each step of how to put on a diaper correctly. Remember, practice makes perfect, and with time, this routine will become second nature.
Your confidence and gentle touch will ease your baby’s discomfort, making the process smoother for both of you.
Step 1: Clean the Baby Thoroughly
With your baby comfortably lying on their back, unfasten the dirty diaper but don’t remove it completely just yet. Use the front part of the diaper to wipe away as much waste as possible. Fold the dirty diaper in half, tucking it underneath your baby’s bottom to act as a barrier during cleaning.
Now, take a fresh baby wipe, or a cotton ball dampened with warm water, and gently clean your baby’s diaper area. For baby girls, always wipe from front to back to prevent urinary tract infections. For boys, ensure thorough cleaning around the penis and scrotum.
Pat your baby’s skin dry using a clean, soft cloth. Once clean and dry, remove the dirty diaper and set it aside.
Step 2: Place the Diaper Correctly
Slide a clean diaper under your baby, ensuring the back is slightly higher than the front. The adhesive tabs should be positioned at the back, ready to be secured. Position the front of the diaper between your baby’s legs, pulling it up towards their belly.
The diaper should be snug but not too tight. You want to allow for comfortable movement. Check the leg openings. The ruffles or gathers around the legs should be unfolded to prevent leaks.
If you’re using a cloth diaper, ensure the absorbent part is correctly positioned within the waterproof cover. The fit should be snug but not restrictive.
Step 3: Secure the Diaper Snugly
After ensuring the diaper is positioned correctly, peel off the protective strips covering the adhesive tabs on the back of the diaper. Bring the front of the diaper across your baby’s tummy. Fasten one adhesive tab at a time to the front of the diaper. Aim for a snug fit that allows for one to two fingers to fit comfortably between the diaper and your baby’s skin.
Avoid fastening the diaper too tightly, as it may cause discomfort or restrict circulation. You should be able to fit two fingers snugly between the diaper and your baby’s waist.
For cloth diapers, fasten the diaper using snaps or Velcro, depending on the style. Check for any gaps or areas that might cause leaks, and adjust as needed.
Step 4: Check for a Secure and Comfortable Fit
Perform a quick check to ensure the diaper is securely fastened. Make sure the tabs are symmetrical and that the diaper isn’t twisted. Run your fingers around the leg openings and waist to confirm there are no gaps.
Your baby should look comfortable, and the diaper should allow for movement without sagging or slipping. Adjust the fit if needed, ensuring that the diaper sits snugly around the legs and waist without causing red marks or leaving indentations on your baby’s skin.
Check that the diaper isn’t too loose, as this can lead to leaks, especially during naps or active play.
Handling Accidents and Preventing Leaks
Diapering accidents are a common part of parenting, especially with newborns. Proper diaper placement, choosing the right diaper size, and frequent diaper checks can prevent many accidents.
A snug but comfortable fit, ensuring the leg cuffs are out, and opting for super-absorbent diapers are key to preventing leaks. Remember to change your baby’s diaper regularly and immediately after bowel movements to avoid diaper rash.
Cleaning Up and Washing Hands
After each diaper change, it’s important to clean up thoroughly. Dispose of the soiled diaper in a diaper pail or trash bin designed to contain odors effectively. For cloth diapers, follow the manufacturer’s washing instructions.
Always wash your hands with soap and warm water to prevent the spread of germs. If a sink isn’t nearby, use a hand sanitizer until you can wash properly.
Tips for Ensuring the Best Fit
Securing the right diaper fit is key to preventing leaks and ensuring your baby’s comfort. Here are some tips:
- Check the Diaper Size: Ensure you are using the correct size based on your baby’s weight and age. If the diaper seems too tight or leaves marks, consider moving up a size.
- Adjust the Tabs: Make sure the adhesive tabs are securely fastened and evenly placed to avoid gaps.
- Unfold the Leg Ruffles: After putting on the diaper, ensure the leg ruffles are unfolded to create a barrier against leaks.
- Test for Comfort: You should be able to fit two fingers comfortably between the diaper and your baby’s waist.
- Avoid Over-Tightening: A too-tight diaper can cause discomfort and even restrict circulation.
Understanding Diaper Rash and How to Prevent It
Diaper rash is a common concern among parents, but it can be prevented with proper care. It usually appears as red, inflamed skin in the diaper area and is caused by prolonged exposure to moisture, irritants, or friction. Prevent diaper rash by changing diapers frequently, using gentle wipes, and applying a thin layer of diaper cream with each change.
Consider using Pee-Ka-Poo’s super-absorbent diapers, which help keep the skin dry for longer periods, reducing the need for frequent changes. Made with bamboo fabric, Pee-Ka-Poo diapers are designed to minimize friction and irritation, helping prevent diaper rash from occurring.
If diaper rash occurs, clean your baby’s bottom gently with a soft wipe, allow it to air dry, and apply a soothing barrier cream. Seek medical advice if the rash persists or worsens.
Different Methods for Boys and Girls
When changing a diaper, consider your baby’s gender, as there are some specific considerations.
Changing a Boy’s Diaper: To avoid being peed on, cover your baby boy’s penis with a cloth or the front of a new diaper during changes. Ensure to clean thoroughly around the penis and scrotum.
Changing a Girl’s Diaper: When cleaning a baby girl, always wipe from front to back to prevent urinary tract infections. Take care to clean all creases gently.
Tips for Nighttime Changes

Nighttime diaper changes can be challenging, especially if you’re concerned about waking your baby. Here are some tips for smoother nighttime diapering:
- Minimize Disruptions: Use a low-light or nightlight to avoid startling your baby awake.
- Opt for Super-Absorbent Diapers: Choose diapers designed for nighttime use to prevent leaks and reduce the need for frequent changes.
- Prepare in Advance: Have everything you need within easy reach to minimize time and movement during nighttime changes.
Changing in Public and On-the-Go
Changing your baby’s diaper in public requires some preparation. Keep a well-stocked diaper bag with all the essentials: diapers, wipes, diaper cream, disposable changing pads, and a spare change of clothes.
When using public restrooms, opt for a changing station or a flat, clean surface. Use a disposable changing pad or a towel to create a clean area for your baby. Dispose of soiled diapers in designated diaper bins or trash bins, and always wash your hands afterward.
Conclusion: Embrace the Journey of Parenthood
Diapering a baby is an essential skill for new parents, and while it may seem daunting initially, it becomes second nature with practice. By selecting the right supplies, maintaining a clean changing area, and following a consistent routine, you’ll be able to keep your baby clean, comfortable, and happy.
Remember, every baby is unique, and finding the best routine for you and your baby takes time. Stay patient, stay positive, and enjoy every moment of this precious journey. With these tips, you’ll master diapering and become a pro in no time.
Frequently Asked Questions
How often should I change my baby’s diaper?
Change a poopy diaper immediately. A wet diaper should be changed every 2-3 hours for newborns and when visibly full for older babies. Prioritizing your baby’s comfort and hygiene ensures their well-being.
What are the signs of a diaper being too tight?
Red marks on the skin, excessive fussiness, and difficulty breathing can indicate a diaper is too tight. Ensure a snug fit without restricting circulation to prevent discomfort and potential diaper rash.
How do I deal with diaper leaks during the night?
Opt for overnight diapers designed for increased absorbency during extended wear. Consider using diaper covers over regular diapers as an added layer of protection against leaks.


