

Create Your Own Diaper Clutch Pattern Easily

Key Highlights
- Learn to create a stylish and practical diaper clutch with this easy-to-follow guide.
- This DIY project makes a heartfelt and useful gift for new moms.
- The pattern is adaptable, allowing you to personalize your clutch.
- Gather simple sewing supplies, including your favorite fabrics and a handy pack of wipes.
- Step-by-step instructions make the process a breeze, even for beginners!
Introduction
Every new mom needs a good diaper bag to hold all the important items. What better way to support her new journey than with a special and personal baby shower gift? This simple guide will help you make a custom diaper clutch. A diaper clutch is a smaller, easier-to-carry version of a diaper bag. It is both stylish and useful.
Understanding the Basics of a Diaper Clutch
A diaper clutch is like a small diaper bag. It’s perfect for quick trips and errands when you don’t want to carry a big bag. It’s small enough to fit in your purse or the car but still roomy enough for everything you need for diaper changes on the move.
Think about packing diapers, wipes, a travel changing pad, and maybe a little tube of diaper rash cream. A good diaper clutch will keep these items organized and easy to grab. This helps you save time and avoid stress during unexpected diaper changes.
What Is a Diaper Clutch?
A diaper clutch is a small diaper bag that makes changing diapers easy while you’re out! It is a compact and portable pouch that holds diapers, wipes, and sometimes a travel changing pad.
Imagine this: You are shopping and your baby needs a change. Instead of searching through a big diaper bag, you can just grab your convenient diaper clutch. It has everything ready for you.
No more carrying around a lot of items or dealing with big bags. With a diaper clutch, you will always be ready for those surprise diaper changes, whether at the grocery store or out for a fun day with your child.
Why Choose a DIY Diaper Clutch?
Creating a DIY diaper clutch gives you many ways to personalize it. You can pick the right fabrics or patterns and add special details to make a unique gift. This thoughtful gift will mean a lot to any new mom. She will see that you spent time and care making something just for her.
Also, DIY diaper clutches are very useful for quick errands! You can grab your important things, put the clutch in your bag, and you’re ready! There’s no need to unpack and repack your whole diaper bag for a quick stop at the grocery store or a playdate at the park.
So, instead of choosing a regular store-bought option, why not make a diaper clutch? It can be useful and show your personal style and care.
Gathering Your Supplies
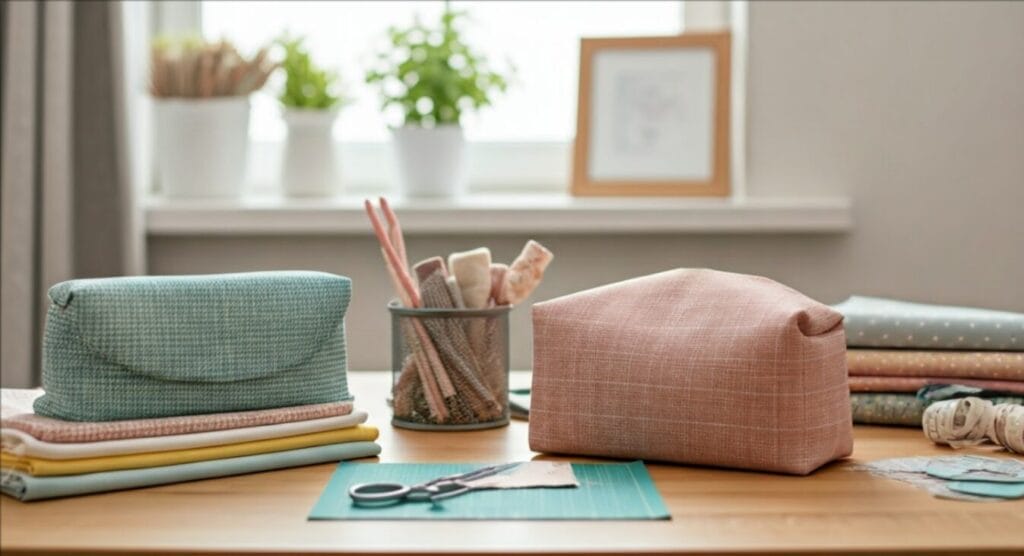
Before we start the step-by-step guide, we should collect all the supplies we need. You won’t need any special tools. Just get a few basic sewing items and your creativity.
Having everything ready will make sewing easier and more fun. So, gather your materials, pick your favorite fabrics, and let’s make this DIY idea come to life!
Essential Materials for Your Diaper Clutch
To make your diaper clutch, you need a few important things. First, get a sewing machine that is all set up. You can sew by hand, but using a machine will make it go much faster.
Next, collect your fabrics. You need one fabric for the outside. Choose something that is both strong and stylish. For the inside, pick a soft fabric that is easy to clean. You can also use fusible fleece. It’s not necessary, but it can help make your clutch stronger.
Finally, remember to grab a pack of wipes. This is the most important part! Having the wipes with you will help you figure out the best size for your clutch so it fits your favorite brand perfectly.
Recommended Fabrics and Accessories
When picking fabrics, think about style and how practical they are. Here are some ideas:
- Outer Fabric: Choose a strong, easy-to-clean material like cotton canvas, quilting cotton, or waterproof fabric for extra protection.
- Lining Fabric: Select a soft, wipeable material like ripstop nylon or PUL (polyurethane laminate) to keep the inside clean and safe.
- Closure Options: You can use magnetic snaps, Velcro, or a zipper to have a secure and stylish close.
(Please remember: This section may have affiliate links to suggest products. I might earn a small commission from purchases made through these links, at no extra cost to you).
Preparing to Sew Your Diaper Clutch
Now that you have your materials ready, it’s time to get ready for the fun part – sewing! To have an easy sewing experience, take a moment to cut your patterns and set up your sewing space.
A bit of organization can help stop frustration and make the whole process more fun. A clean workspace also allows you to enjoy your creative time even more!
Cutting Patterns and Fabric
Begin by printing and cutting out your pattern pieces. Make sure you print them at 100% scale. This will help you get the right size for your diaper clutch. Next, arrange the pattern pieces on your chosen fabric according to the instructions.
Pay attention to the “place on fold” markings. This will help ensure your fabric pieces are the right size. If you are using fat quarters, check the fabric’s fold to make the best use of your material.
Once everything looks good, carefully cut out your fabric pieces along the outlines. This step is very important for creating a well-made diaper clutch. Take your time to make sure your cuts are accurate.
Organizing Your Sewing Space
Before you begin sewing, tidy up your workspace. Put all the tools you need close by. This usually means your sewing machine, scissors, pins, fabric clips, measuring tape, and an iron for pressing seams.
Good lighting is very important for easy sewing. Make sure your workspace is bright. Natural light is best, but if you don’t have that, use enough lamps to avoid eye strain.
A clean and organized workspace helps you avoid distractions. This lets you focus on your sewing. As you go through the tutorial, look at the lots of photos provided for help.
Step-by-Step Guide to Creating Your Diaper Clutch

Now that you have everything ready, it’s time to put together your diaper clutch! The step-by-step instructions will guide you through the sewing process. It will be easy to follow, even if you’re a beginner.
So, gather your fabric pieces and get ready to see your custom diaper clutch come to life!
Step 1: Assemble Your Pattern Pieces
The first step is to put the pattern pieces together the right way. Take your outer fabric pieces and place them with the right sides facing each other, matching the straight edges. Use pins or fabric clips to hold the layers in place. This stops them from moving while you sew.
Then, do the same with the lining fabric pieces. Place them with right sides together and align the straight edges. Secure them with pins or clips just like you did for the outer fabric.
Next, check to make sure the right side of the fabric is facing inward for both the outer and lining pieces. This will hide the seams inside the finished diaper clutch.
Step 2: Sewing the Outer Shell and Lining
Once your fabric pieces are pinned well, it is time to sew. Start by sewing along the pinned edges of the outer fabric. Make sure to keep a consistent seam allowance. Do a backstitch at both the start and end to stop unraveling.
Do the same for the lining fabric pieces. Sew along the pinned edges, also using a consistent seam allowance. Don’t forget to backstitch at the ends for extra strength.
After sewing the main seams, press them open with an iron. This will help you have sharp, professional-looking edges. For more durability, you can add a top stitch along the seam lines on both the outer fabric and the lining fabric.
Customizing Your Diaper Clutch
Now comes the fun part – adding your personal touch! Making a diaper clutch lets you customize it in many ways, making it one of a kind.
You can try out different ideas to design a diaper clutch that shows your style and matches the personality of the person who will use it!
Adding Personal Touches
Consider adding personal touches to your diaper clutch. You can use a cute appliqué, nice stitching, or a label with the baby’s initials. These little details can make your clutch a special keepsake.
You may decorate the whole bag or just parts of it, like the front of the bag. For example, adding a simple strip of different fabric on the flap can give it a nice pop of color and charm.
The options are endless! So, don’t hold back. Get creative and make this diaper clutch truly yours.
Tips for Making a Jujube Diaper Clutch
For those seeking a more sophisticated aesthetic, a Jujube diaper clutch is a fantastic option! These clutches are known for their sleek designs, vibrant colors, and practical features.
One of the easiest ways to achieve the signature Jujube look is by incorporating contrasting fabrics and piping details. Here’s a quick breakdown of essential elements:
| Feature | Description |
| Contrasting Fabrics | Use different fabrics for the main body, flap, and pockets to create a visually appealing design. |
| Piping Details | Add piping (thin fabric tubes) to the seams for a polished and professional look, mimicking the distinctive Jujube style. |
Conclusion
Creating your own diaper clutch can be a fun project for any parent. It is practical too. First, learn the basics and gather the supplies you need. Then, follow a simple guide. This way, you can make a diaper clutch that fits your style. You can choose a simple design or add your personal touch. The options are endless. Start this DIY project and enjoy having a stylish diaper clutch for all your essentials. Be creative and start sewing!
Frequently Asked Questions
What are the dimensions of a standard diaper clutch?
A regular diaper clutch is usually about 10 inches long, 6 inches wide, and 2-3 inches deep. The size can change based on the design and how much it can hold. There are also mini diaper clutches. They are smaller and great for people who want to carry less.
Can I make a diaper clutch that fits more than just diapers and wipes?
Sure! Diaper clutches are made to hold diapers and wipes, but they can do so much more. You can change their size and add pockets. This way, you can fit items like a small cream for diaper rash, a pacifier, or even your phone and keys.
How do I wash and care for my DIY diaper clutch?
Caring for your DIY diaper clutch is simple. If you are using regular quilting cotton, you can wash it in the machine on a gentle cycle and let it air dry. Make sure to check the care instructions for your chosen fabrics first. Some materials may need special cleaning care.
Are there any beginner-friendly patterns that are also stylish?
Many stylish and easy diaper clutch patterns can be found online and in sewing groups. Search for patterns that have simple designs. Make sure they include clear instructions and pictures for each step.
Where can I find more inspiration for customizing my diaper clutch?
Pinterest, Instagram, and sewing blogs are great places to find ideas. You can search for “diaper clutch customization” or “DIY diaper clutch ideas.” This way, you can see different ways to add extra touches, mix fabrics, and find special design features.


